This session will help audience to understand what is Progressive Delivery and how we can achieve it using Argo Rollouts
Hands-On lab steps:
Clone the Argo Rollouts example GitHub repo or preferably, please fork this
git clone https://github.com/NiniiGit/argo-rollouts-example.git
Install Helm3 as it would be needed later during the demo
curl -fsSL -o get_helm.sh https://raw.githubusercontent.com/helm/helm/main/scripts/get-helm-3
chmod 700 get_helm.sh
./get_helm.sh
helm version
Installation of Argo Rollouts controller
Create the namespace for installation of the Argo Rollouts controller
kubectl create namespace argo-rollouts
You will see the namespace been created
kubectl get ns argo-rollouts
Our current Kubernetes cluster version that we are running on this platform is v1.23.x and the Argo team is working on their new release of Argo Rollouts controller 1.2.0(Soon to be officially released), which would be compatible to our current Kubernetes platform. So we will use the pre-release version(https://github.com/argoproj/argo-rollouts/releases/tag/v1.2.0-rc2) to install the Argo Rollouts controller.
kubectl apply -n argo-rollouts -f argo-rollouts-example/argo-controller-installation/install.yaml
You will see the controller and other components been deployed. Wait for the pods to be in “Running” state
kubectl get all -n argo-rollouts
Install Argo Rollouts Kubectl plugin with curl.
curl -LO https://github.com/argoproj/argo-rollouts/releases/latest/download/kubectl-argo-rollouts-linux-amd64
chmod +x ./kubectl-argo-rollouts-linux-amd64
sudo mv ./kubectl-argo-rollouts-linux-amd64 /usr/local/bin/kubectl-argo-rollouts
kubectl argo rollouts version
Argo Rollouts comes with its own GUI as well that you can access with below command:
kubectl argo rollouts dashboard
and now access it, by clicking on the below sign available on the right side.

you would be presented with UI as shown below(currently it won’t show you anything since we are yet to deploy any Argo Rollouts based app):

Now, let’s go ahead and deploy our first sample app using the Blue-Green Deployment strategy.
A) Blue-Green Deployment with Argo Rollouts
To experience how the blue-green deployment works with Argo Rollouts, we will deploy the sample app which contains Rollouts, Service, and Ingress as K8S objects.
rollout.yaml content:
# This example demonstrates a Rollout using the blue-green update strategy, which contains a manual
# gate before promoting the new stack.
apiVersion: argoproj.io/v1alpha1
kind: Rollout
metadata:
  name: rollout-bluegreen
spec:
  replicas: 2
  revisionHistoryLimit: 2
  selector:
    matchLabels:
      app: rollout-bluegreen
  template:
    metadata:
      labels:
        app: rollout-bluegreen
    spec:
      containers:
      - name: rollouts-demo
        image: argoproj/rollouts-demo:blue
        imagePullPolicy: Always
        ports:
        - containerPort: 8080
  strategy:
    blueGreen:
      # activeService specifies the service to update with the new template hash at time of promotion.
      # This field is mandatory for the blueGreen update strategy.
      activeService: rollout-bluegreen-active
      # previewService specifies the service to update with the new template hash before promotion.
      # This allows the preview stack to be reachable without serving production traffic.
      # This field is optional.
      previewService: rollout-bluegreen-preview
      # autoPromotionEnabled disables automated promotion of the new stack by pausing the rollout
      # immediately before the promotion. If omitted, the default behavior is to promote the new
      # stack as soon as the ReplicaSet are completely ready/available.
      # Rollouts can be resumed using: `kubectl argo rollouts promote ROLLOUT`
      autoPromotionEnabled: false
service.yaml content:
kind: Service
apiVersion: v1
metadata:
  name: rollout-bluegreen-active
spec:
  selector:
    app: rollout-bluegreen
  ports:
  - protocol: TCP
    port: 80
    targetPort: 8080

---
kind: Service
apiVersion: v1
metadata:
  name: rollout-bluegreen-preview
spec:
  selector:
    app: rollout-bluegreen
  ports:
  - protocol: TCP
    port: 80
    targetPort: 8080
ingress.yaml content:
apiVersion: networking.k8s.io/v1
kind: Ingress
metadata:
  name: rollout-bluegreen
  annotations:
    kubernetes.io/ingress.class: nginx
spec:
  rules:
  - http:
      paths:
      - path: /
        pathType: Prefix
        backend:
          service:
            name: rollout-bluegreen-active
            port:
              number: 80
Now, let’s create all these objects for now in the `default` namespace. Please execute the below commands:
kubectl apply -f argo-rollouts-example/blue-green-deployment-example/
You would be able to see all the objects been created in the default namespace by running the below commands:
kubectl get all
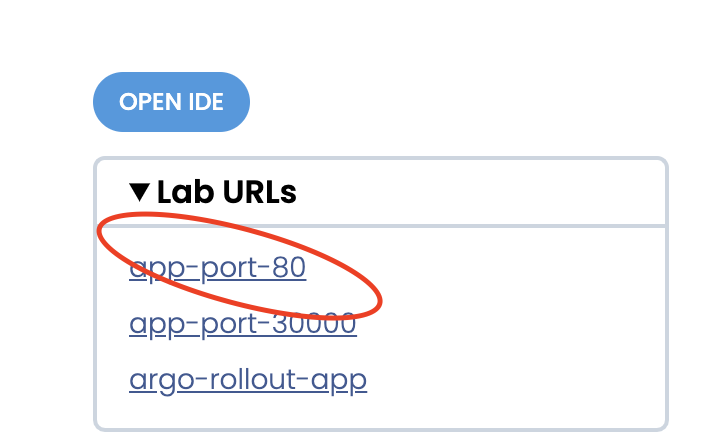
Now, you can access your sample app, by clicking on the below sign available on the right side.

You would be able to see app as below:

Now you can go back and visit the Argo Rollouts console(which was blank previously) by clicking on the URL as did earlier

And this time, you could see the sample deployed Argo Rollouts on console as below

You can click on this “rollout-bluegreen” and it will present you with its current status as below

Going forward, either you can use this GUI or else (Preferably) use commands shown below to continue with this demo.
You can see the current status of this rollout by running below command as well
kubectl argo rollouts get rollout rollout-bluegreen
Now, let’s deploy the Green version of the app via command line
kubectl argo rollouts set image rollout-bluegreen rollouts-demo=argoproj/rollouts-demo:green
You would be able to see new i.e “green” version based set of pods of our sample app, coming up
kubectl get pods
Now, after a few seconds, you would be able to see both i.e your old set of pods (with version blue) as well as the new set of pods(with version green) available. Also on Argo console, you would be able to see below the kind of new revision of the app with changed image version running.

If you visit the app URL on app-port-80, you would still see only the blue version is visible rightly because we have not yet fully promoted the green version of our app
You can confirm the same now, by running the command below, which shows, the new version is in “paused” state
kubectl argo rollouts get rollout rollout-bluegreen
Now, lets promote the green version of our app, by executing below command
kubectl argo rollouts promote rollout-bluegreen
Run the above command “kubectl argo rollouts get rollout rollout-bluegreen” and you would see it’s scaling the new i.e green version of our app completely. Same can be confirmed by running below command, which shows old set of pods i.e old blue version of our app, terminating or already terminated.
kubectl get pods
If you visit the app URL on app-port-80 this time, you would see only the Green version is visible right now because we have fully promoted the green version of our app

Congratulations!! you have successfully completed the blue-green deployment using Argo Rollouts.
Now, let’s move ahead and learn about Canary deployment using Argo Rollouts. But prior to that let’s delete this entire setup i.e our sample deployed app using the below command.
kubectl delete -f argo-rollouts-example/blue-green-deployment-example/
P.S: Make sure to check if old pods etc have been deleted correctly before, starting with the next tasks
B) Canary Deployment with Argo Rollouts
To experience how the Canary deployment works with Argo Rollouts, we will deploy the sample app which contains Rollouts with canary strategy, Service, and Ingress as K8S objects.
rollout.yaml content:
apiVersion: argoproj.io/v1alpha1
kind: Rollout
metadata:
  name: rollouts-demo
spec:
  replicas: 5
  strategy:
    canary:
      steps:
      - setWeight: 20
      - pause: {}
      - setWeight: 40
      - pause: {duration: 10}
      - setWeight: 60
      - pause: {duration: 10}
      - setWeight: 80
      - pause: {duration: 10}
  revisionHistoryLimit: 2
  selector:
    matchLabels:
      app: rollouts-demo
  template:
    metadata:
      labels:
        app: rollouts-demo
    spec:
      containers:
      - name: rollouts-demo
        image: argoproj/rollouts-demo:blue
        ports:
        - name: http
          containerPort: 8080
          protocol: TCP
        resources:
          requests:
            memory: 32Mi
            cpu: 5m
service.yaml content:
apiVersion: v1
kind: Service
metadata:
  name: rollouts-demo
spec:
  ports:
  - port: 80
    targetPort: http
    protocol: TCP
    name: http
  selector:
    app: rollouts-demo
ingress.yaml content:
apiVersion: networking.k8s.io/v1
kind: Ingress
metadata:
  name: rollouts-ingress
  annotations:
    kubernetes.io/ingress.class: nginx
spec:
  rules:
  - http:
      paths:
      - path: /
        pathType: Prefix
        backend:
          service:
            name: rollouts-demo
            port:
              number: 80
Now, let’s create all these objects for now in the `default` namespace. Please execute the below commands:
kubectl apply -f argo-rollouts-example/canary-deployment-example/
You would be able to see all the objects been created in the default namespace by running the below commands:
kubectl get all
Now, you can access your sample app, by clicking on the below sign available on the right side.

You would be able to see app as below:

Now you can visit the Argo Rollouts console(which was blank previously) by clicking on the URL as did earlier

And this time, you could see the sample deployed Argo Rollouts on console as below

You can click on this “rollout-demo” and it will present you with its current status of it as below

Again, either you can use this GUI or else (preferably) use command shown below to continue with this demo.
You can see the current status of this rollout by running the below command as well
kubectl argo rollouts get rollout rollouts-demo
Now, let’s deploy the Yellow version of the app using canary strategy via command line
kubectl argo rollouts set image rollouts-demo rollouts-demo=argoproj/rollouts-demo:yellow
You would be able to see a new i.e “yellow” version-based pod of our sample app, coming up.
kubectl get pods
Currently, only 20% i.e 1 out of 5 pods with yellow version will come online, and then it will “paused” as we have mentioned in the steps above.
Also on Argo console, you would be able to see below the kind of new revision of the app with changed image version running.

If you visit the app URL on app-port-80, you would still see only the majority blue version and very less number of yellow is visible rightly because we have not yet fully promoted the yellow version of our app

You can confirm the same now, by running the command below, which shows, the new version is in “paused” state
kubectl argo rollouts get rollout rollouts-demo
Now, lets promote the yellow version of our app, by executing below command
kubectl argo rollouts promote rollouts-demo
Run the above command “kubectl argo rollouts get rollout rollout-demo” and you would see it’s scaling the new i.e yellow version of our app completely. Same can be confirmed by running below command, which shows old set of pods i.e old blue version of our app, terminating or already terminated
kubectl get pods
Eventually, if you visit the app URL on app-port-80 this time, you would see only the Yellow version is visible right now because we have fully promoted the yellow version of our app

Kudos!! you have successfully completed the Canary Deployment as well using Argo Rollouts.
Now, let’s move ahead and learn about Canary Deployment with Analysis using Argo Rollouts. But prior to that let’s delete this entire setup i.e our sample deployed app using the below command.
kubectl delete -f argo-rollouts-example/canary-deployment-example/
P.S: Make sure to check if old pods etc have been deleted correctly before, starting with the next tasks
C) Canary with Analysis Deployment using Argo Rollouts
To experience how the Canary deployment works with Argo Rollouts, we will deploy the sample app which contains Rollouts with canary strategy, Service, and Ingress as K8S objects.
analysis.yaml content:
kind: AnalysisTemplate
apiVersion: argoproj.io/v1alpha1
metadata:
  name: canary-check
spec:
  metrics:
  - name: test
    provider:
      job:
        spec:
          backoffLimit: 1
          template:
            spec:
              containers:
              - name: busybox
                image: busybox
                #args: [test]  #--> for making analysis fail, uncomment
              restartPolicy: Never
rollout.yaml content:
apiVersion: argoproj.io/v1alpha1
kind: Rollout
metadata:
  name: rollouts-demo
spec:
  replicas: 5
  strategy:
    canary:
      steps:
      - setWeight: 20
      - pause: {duration: 10}
      - analysis:
          templates:
          - templateName: canary-check
      - setWeight: 40
      - pause: {duration: 10}
      - setWeight: 60
      - pause: {duration: 10}
      - setWeight: 80
      - pause: {duration: 10}
  revisionHistoryLimit: 2
  selector:
    matchLabels:
      app: rollouts-demo
  template:
    metadata:
      labels:
        app: rollouts-demo
    spec:
      containers:
      - name: rollouts-demo
        image: argoproj/rollouts-demo:blue
        ports:
        - name: http
          containerPort: 8080
          protocol: TCP
        resources:
          requests:
            memory: 32Mi
            cpu: 5m
service.yaml content:
apiVersion: v1
kind: Service
metadata:
  name: rollouts-demo
spec:
  ports:
  - port: 80
    targetPort: http
    protocol: TCP
    name: http
  selector:
    app: rollouts-demo
ingress.yaml content:
apiVersion: networking.k8s.io/v1
kind: Ingress
metadata:
  name: rollout-ingress
  annotations:
    kubernetes.io/ingress.class: nginx
spec:
  rules:
  - http:
      paths:
      - path: /
        pathType: Prefix
        backend:
          service:
            name: rollouts-demo
            port:
              number: 80
Now, let’s create all these objects for now in the `default` namespace. Please execute the below commands:
kubectl apply -f argo-rollouts-example/canary-deployment-withanalysis-example/
You would be able to see all the objects been created in the default namespace by running the below commands:
kubectl get all
Now, you can access your sample app, by clicking on the below sign available on the right side.
You would be able to see the app as below:

Now you can visit the Argo Rollouts console by clicking on the URL as did earlier.

And this time, you could see the sample deployed Argo Rollouts on console as below

You can click on this “rollout-demo” and it will present you with its current status of it as below

Either you can use this GUI or else (preferably) use the command shown below to continue with this demo.
You can see the current status of this rollout by running the below command as well
kubectl argo rollouts get rollout rollouts-demo
When Analysis becomes successful
Now, let’s deploy the yellow version of the app using the canary strategy via the command line.
kubectl argo rollouts set image rollouts-demo rollouts-demo=argoproj/rollouts-demo:yellow
You would be able to see a new i.e “yellow” version-based pod of our sample app, coming up.
kubectl get pods
Currently, only 20% i.e 1 out of 5 pods with yellow version will come online, and then it will “pause” for 10 sec before it initiates “Analysis” as we have mentioned in the steps above.
For Rollout, if Analysis [“AnalysisRun” triggered by “AnalysisTemplate” to be precise] is successful then it understands that it can promote the rollout else it will safely roll back to the previous revision.
kubectl get AnalysisTemplate
Let’s confirm if it has created AnalysisRun or not
kubectl get AnalysisRun
This AnalysisRun will eventually create a Kubernetes job to execute and based on its exit status, it would either roll forward or roll back
kubectl get job -o wide
In order to show how Rollout promotes in case of your Analysis is successful, we are just running a “busy box” container which will eventually exit with status code 0. This makes rollout believe that analysis is been successfully completed and it’s good to proceed ahead.
Execute the below command and you would be able to see Analysis being getting executed as part of rollouts:
kubectl argo rollouts get rollout rollouts-demo
Also on the Argo console, you would be able to see below the kind of new revision of the app with the changed image version running.

If you visit the app URL on app-port-80, you would still see only the majority blue version and very less number of yellow is visible initially because Rollout is waiting for the results of the Analysis job to decide whether it would promote and proceed with the rest of the canary deployment steps OR it will Rollback.

Once the Analysis is successful, you would see more of “yellow” version app running as below

Now let’s delete this setup before we test how Argo Rollouts behave in case of Analysis gets failed
kubectl delete -f argo-rollouts-example/canary-deployment-withanalysis-example/
When Analysis becomes unsuccessful
To verify how Argo Rollout automatically roll back the new revision in case of Analysis is not successful, we would make this time “Analysis” to get purposefully failed. To do that,
Let’s open the cloned repo in the online editor as shown below.
Access the OPEN IDE, which will open the VS code like editor in another tab

Open the analysis.yaml from the editor

Now let’s uncomment the line number 17 from the analysis.yaml and save it.

Now, this change will basically make your “Analysis” fail and will show you how Rollout will roll back to the old revision itself. We will repeat all the steps that we did earlier in case of Analysis becomes successful.
D) Canary with traffic management using Nginx controller
You must be wondering how we should test internally if my canary or blue-green version of service is really working and handling traffic i.e client requests well or not before we release it as a beta feature or subsequently to a larger audience. In this hands-on, we would play around with using Nginx-controller and by passing additional header values with our client requests, which would make sure that all our client requests would always route to the canary version of our sample Nginx service.
We have created a sample Nginx service which is wrapped up as a helm chart and available inside folder “argo-traffic-management-demo”
We will be running this demo in “ic-demo” namespace, so lets create the same namespace
kubectl create ns ic-demo
Now, before deploying helm chart; Let’s update the hostname value in values.yaml . Please access the OPEN IDE, which will open the VS code like editor in another tab and then access the argo-traffic-management-demo/values.yaml file .
Update the below entry:

let’s deploy the helm-chart, which will eventually create all the necessary k8s objects in `ic-demo` namespace
cd argo-rollouts-example

helm install demo-nginx -n ic-demo ./argo-traffic-management-demo
Verify the deployment status by running the following.
helm list -n ic-demo
Now, you can check the status of your rollouts using the following command.
kubectl argo rollouts get rollout demo-nginx -n ic-demo
If you look at the above command output, you could see the rollout object has been created with the given replicas (1). Since this is the first revision, there will not be any canary replicaset. Now you can update the image tag in `values.yaml` and run a `helm upgrade` to update the rollout object.
So again follow the steps as we did in case of #analysis is unsuccessful. Please access the OPEN IDE, which will open the VS code like editor in another tab and then access the argo-traffic-management-demo/values.yaml file and update the image tag from the existing 1.19.1 to 1.20.0 as shown below:

Now, let’s run a `helm upgrade` to update the rollout object
cd argo-rollouts-example

helm upgrade demo-nginx -n ic-demo ./argo-traffic-management-demo
Now watch the rollout object status
kubectl argo rollouts get rollout demo-nginx -n ic-demo
You should be able to see something like the stable and canary sections below. A new replica set has been created for the new canary pods.
Now please access the OPEN IDE, which will open the VS code like editor in another tab and then access splitted terminal below.
Now in one of the terminals; run the command below, which will basically tail lively the logs of pods running as canary servic
kubectl logs -f <canary-pod-name> -n ic-demo
Now in another terminal, access the app URL using the exposed ingress URL and passing the custom header values.
curl -H "canary: yep" -IL http://<your-host-name>/helloe/jsbdsdsd.html
you would be able to see our curl request (which we are mimicking as a client request) are always landing on our canary version of service only as shown below screenshot:

Now, you need to promote the rollout object after manual verification
kubectl argo rollouts promote demo-nginx -n ic-demo
Now let’s delete this test setup
helm delete demo-nginx -n ic-demo
