Introduction
In today’s data-centric landscape, organizations are constantly seeking innovative ways to extract insights and drive decision-making processes. Jupyter Notebooks have emerged as essential tools for data scientists, offering an interactive environment for data exploration, visualization, and analysis. However, as data volumes grow and computational demands increase, the need for scalable and efficient infrastructure becomes clear. Enter Kubernetes – an orchestrator that simplifies the deployment and management of containerized applications.
In this post, we explore the relationship between Kubernetes and Jupyter Notebooks, presenting a fascinating solution for data science workflows.
What are Jupyter Notebooks?
Jupyter Notebooks are interactive computing environments that allow users to create and share documents containing live code, equations, visualizations, and narrative text. They are widely used for data analysis, machine learning, scientific computing, and education.
Jupyter Notebook is a web based application where we can write and execute code in small, manageable chunks called cells.
Why Run Jupyter Notebooks on Kubernetes?
To achieve,
- Scalability: Able to scale resources dynamically based on demand.
- Portability: Easy to deploy on different platforms.
- Resource Optimization:Efficient utilization of compute resources.
- Team Collaboration:Simplifies sharing and collaboration among team members.
Prerequisites
- Basic understanding of Jupyter Notebooks and Kubernetes concepts.
- Access to a Kubernetes cluster.
- Install Helm for JupyterHub installation.
- Install kubectl, the Kubernetes command-line tool, to manage and interact with Kubernetes cluster.
Setting Up JupyterHub on Kubernetes
- I have set up Kubernetes by installing Docker Desktop to obtain a Kubernetes cluster.
- Verify your k8s cluster.
Kubectl get nodes

- Install JupyterHub:
- JupyterHub Helm chart is used to install JupyterHub on k8s cluster.
- Create config.yaml file.
- We don’t need any configuration to get started so we can comment on useful links in this file for now.
- Add jupyterhub repo using helm
helm repo add jupyterhub https://hub.jupyter.org/helm-chart/
helm repo update
- Run following command from the directory that contains config.yaml file.
helm upgrade --cleanup-on-fail --install jupyter-hub jupyterhub/jupyterhub --namespace k8s-jupyter --create-namespace --values config.yaml

- JupyterHub is installed.
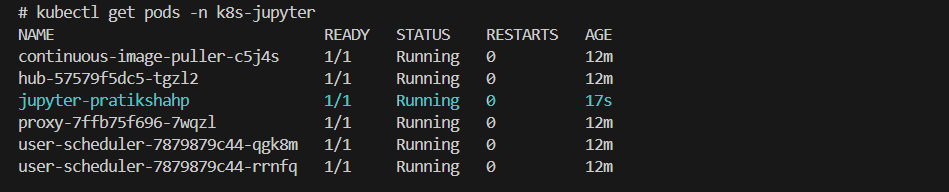
- Verify hub and proxy pods are running or not.
kubectl get pods -n k8s-jupyter

- Get services and verify proxy-public is available with External-IP,
kubectl get svc -n k8s-jupyter

- We are good to go!!!, Enter the external IP of the proxy-public service into the browser! You can see the Homepage.
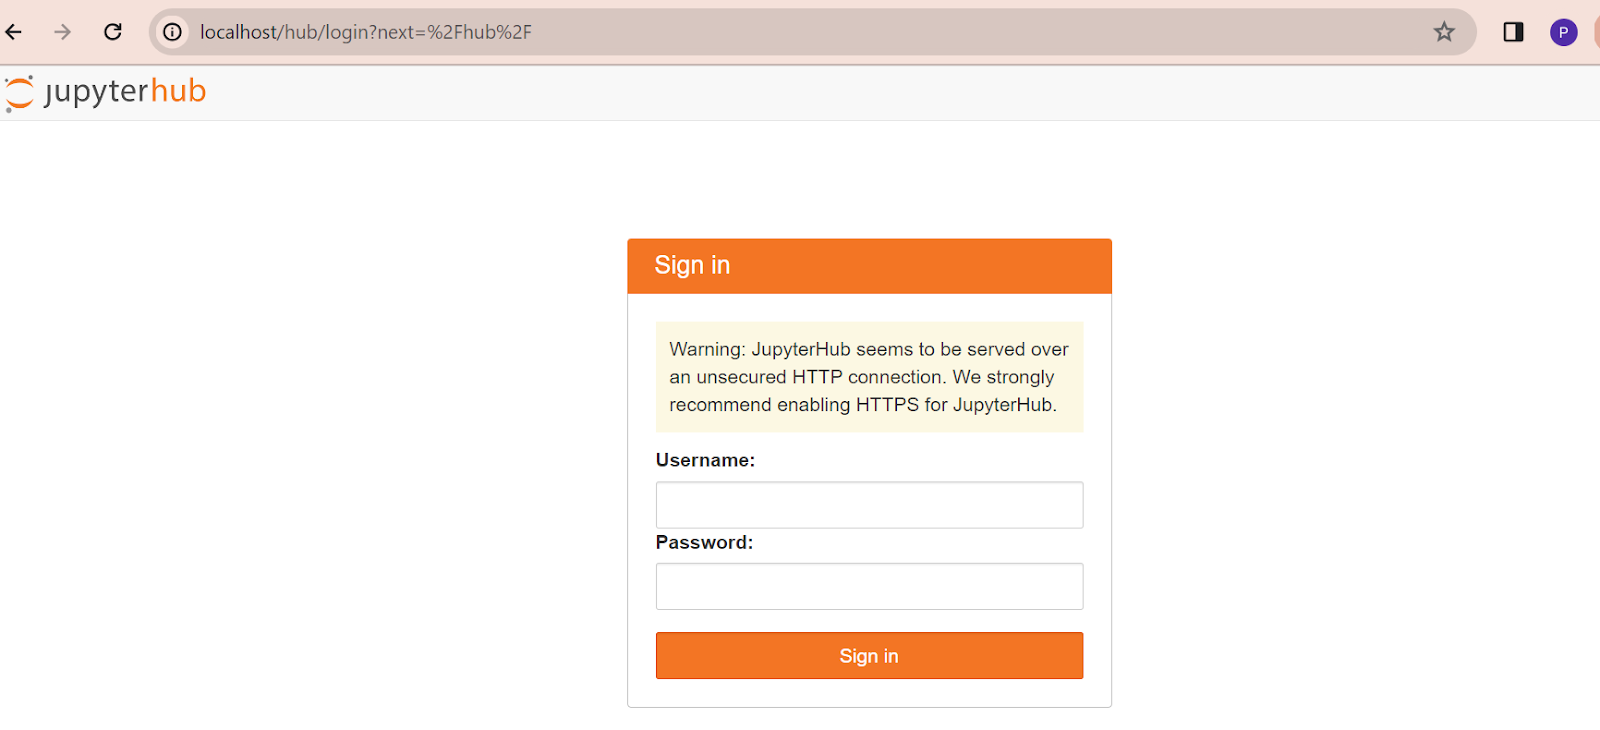
- Apply any Username and password of your choice! And sign in to Jupyter Dashboard.
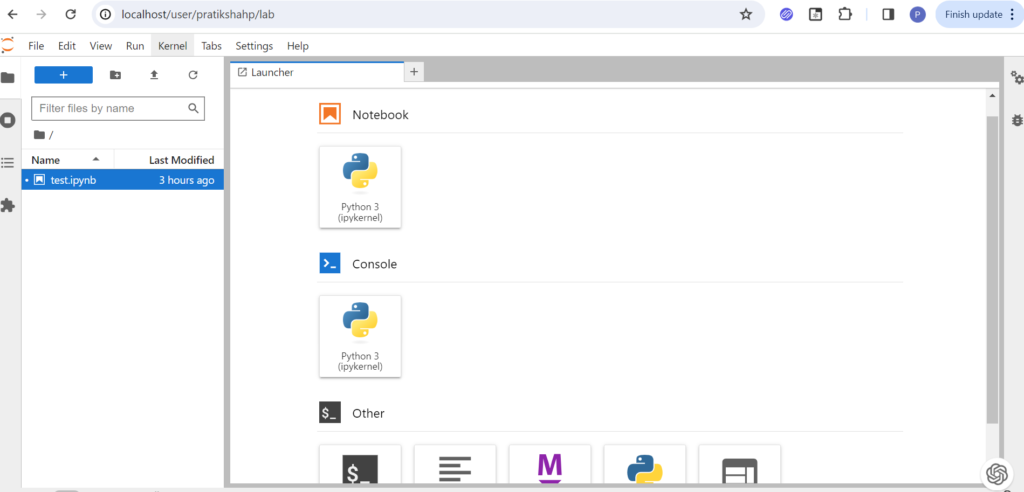
- It will create a Kubernetes pod for users in a k8s-jupyter namespace.
- Come back to the Jupyter dashboard and open the notebook. Here we will run a simple python program.
def main():
    # Ask the user for their name
    name = input("What is your name? ")

    # Print a personalized greeting
    print("Hello, " + name + "! Nice to meet you.")

if __name__ == "__main__":
    main()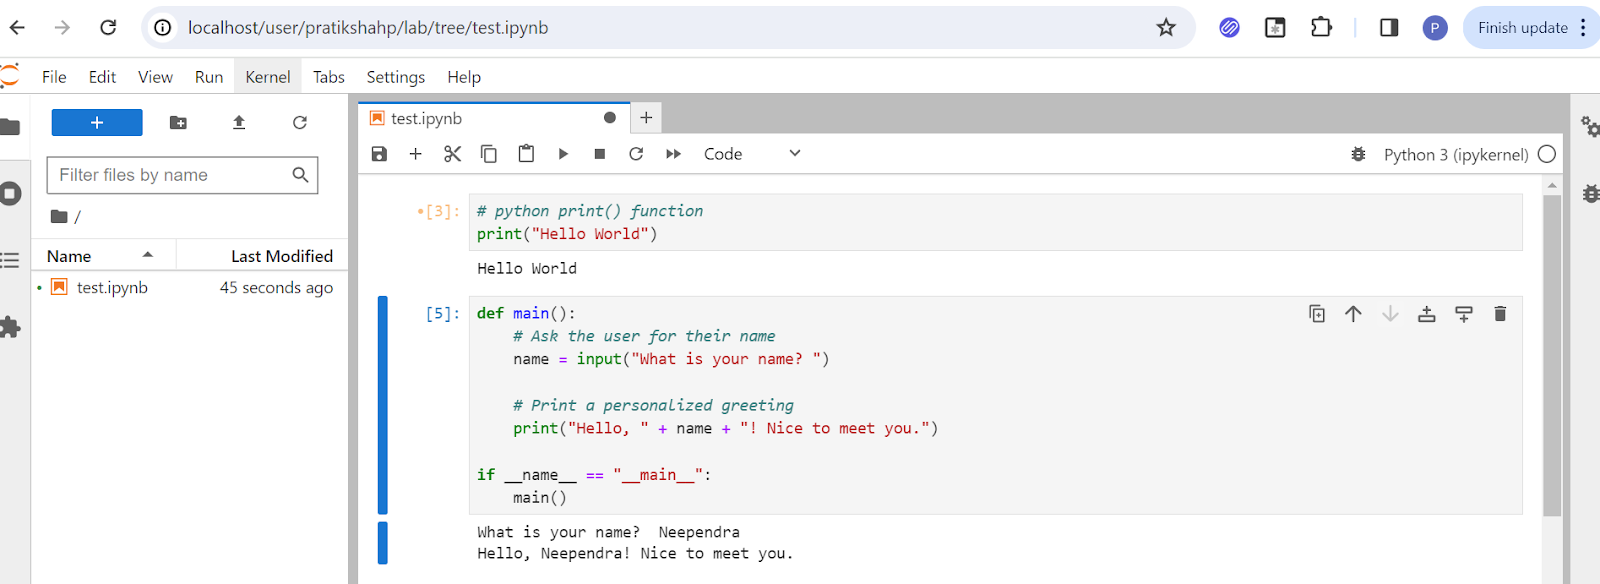
- Play with your jupyter notebook. Add more shells and execute them.
Conclusion
- We’ve demonstrated how to set up JupyterHub on Kubernetes using Helm, enabling users to create and share interactive computing environments effortlessly.
- With JupyterHub, users can access their personalized Jupyter Notebooks on-demand, collaborate with team members, and leverage the power of Kubernetes for efficient resource utilization.
- In our upcoming blog, we’ll explore configuring and customizing JupyterHub to meet various deployment needs like user environment, storage, resources and user management.
